
Video: How To Remove back cover on your Nokia Lumia 820 (Filmed on Nokia Lumia 920)
Whilst my inexorably slow computer gets around to rendering my unboxing of the Nokia Lumia 820 and accessories, here’s a video to show how to remove the back cover.
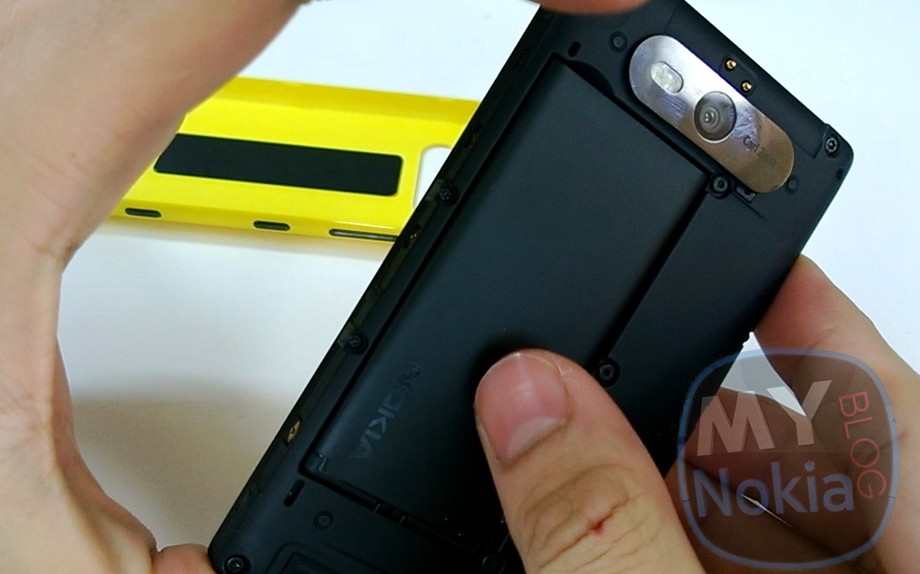
The Nokia Lumia 820 feels really solid, like the battery is almost sealed in. It doesn’t look like the back cover should come off, but as you know, you can have a range of shell options, some including new features such as being rugged or wireless charging or perhaps whatever your imagination will allow with 3D printed covers. Â With the 820’s back cover removed, you have access to the 1650mAh battery (which you can swap out if you wanted) as well as the SIM and MicroSD slot (for additional memory expansion).
The video below is filmed on the Nokia Lumia 920 (set at 720p as I forgot to switch it up).
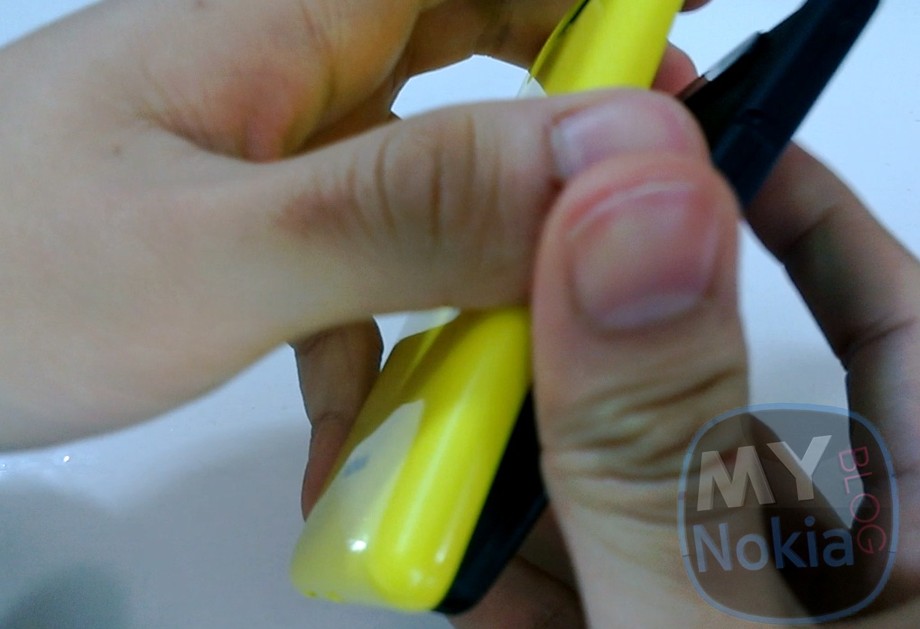
1) You’re gonna start by placing a thumbnail on the top right corner of the 820, where the colourful cover meets the plastic black rim edge.

2) For leverage, put a finger at the back strip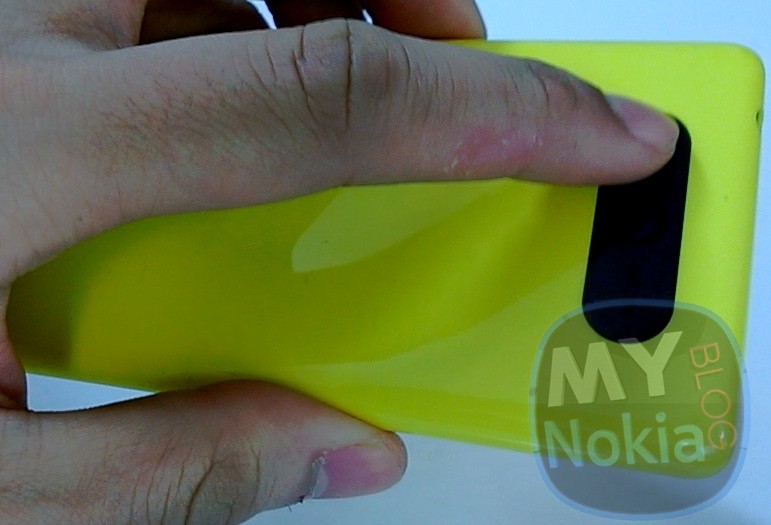
3) Now just push and the cover will separate
4) Slide fingernail along top edge and this releases the rest of the cover.
5) To reattach, begin by slotting the bottom in first and just press the cover to the 820. You should hear some healthy clicking/snapping shut.
About the Author (Author Profile)
Hey, thanks for reading my post. My name is Jay and I'm a medical student at the University of Manchester. When I can, I blog here at mynokiablog.com and tweet now and again @jaymontano. We also have a twitter and facebook accounts @mynokiablog and  Facebook.com/mynokiablog. Check out the tips, guides and rules for commenting >>click<< Contact us at tips(@)mynokiablog.com or email me directly on jay[at]mynokiablog.comSubscribe
If you enjoyed this article, subscribe to receive more just like it.


Connect
Connect with us on the following social media platforms.